

This 3-day plan shows you exactly how to teach Leave It—from foundation to real-life proofing. You’ll prevent dangerous floor-snacks, leash lunges, and door-dashes using reward-based steps, precise timing, and safety tips. Calm dog, confident handler, reliable control—fast.
Mastering the Leave It cue gives you everyday safety superpowers: no more lunging at chicken bones, jumping for pills, or snatching toys from toddlers. This guide delivers a clear, reward-based plan to teach Leave It in 3 days—then shows you how to make it reliable in the real world. You’ll use small, achievable steps, excellent timing, and strategic rewards so your dog chooses self-control without fear or force.
Why “Leave It” Matters
- Safety: Prevents ingestion of toxic foods, trash, or medications.
- Politeness: Stops rude snatching, countersurfing, and pocket-picking.
- Focus: Teaches impulse control that spills over to leash manners and greetings.
We’ll work with a food reward, then upgrade to toys, scents, moving objects, and outdoor distractions. Expect many short wins, not marathon sessions: 3–5 minutes, 3–5 times per day.
Before You Start (10-Minute Prep)
Equipment
- Two types of treats: training treats (regular) and jackpot treats (extra special).
- Flat collar or harness, 6–8 ft leash; optional long line for outdoor proofing.
- Quiet space with minimal distractions; non-slip floor.
Reward Rules
- Always pay for the behavior you want: turning away, eye contact, backing off.
- Never reward from the “forbidden” item—payment comes from you, not the floor.
- Keep your hands still; let your timing and marker (“Yes!” or click) do the talking.
Day 1 — Foundation: “Back Off & Look to Me” (Indoor)
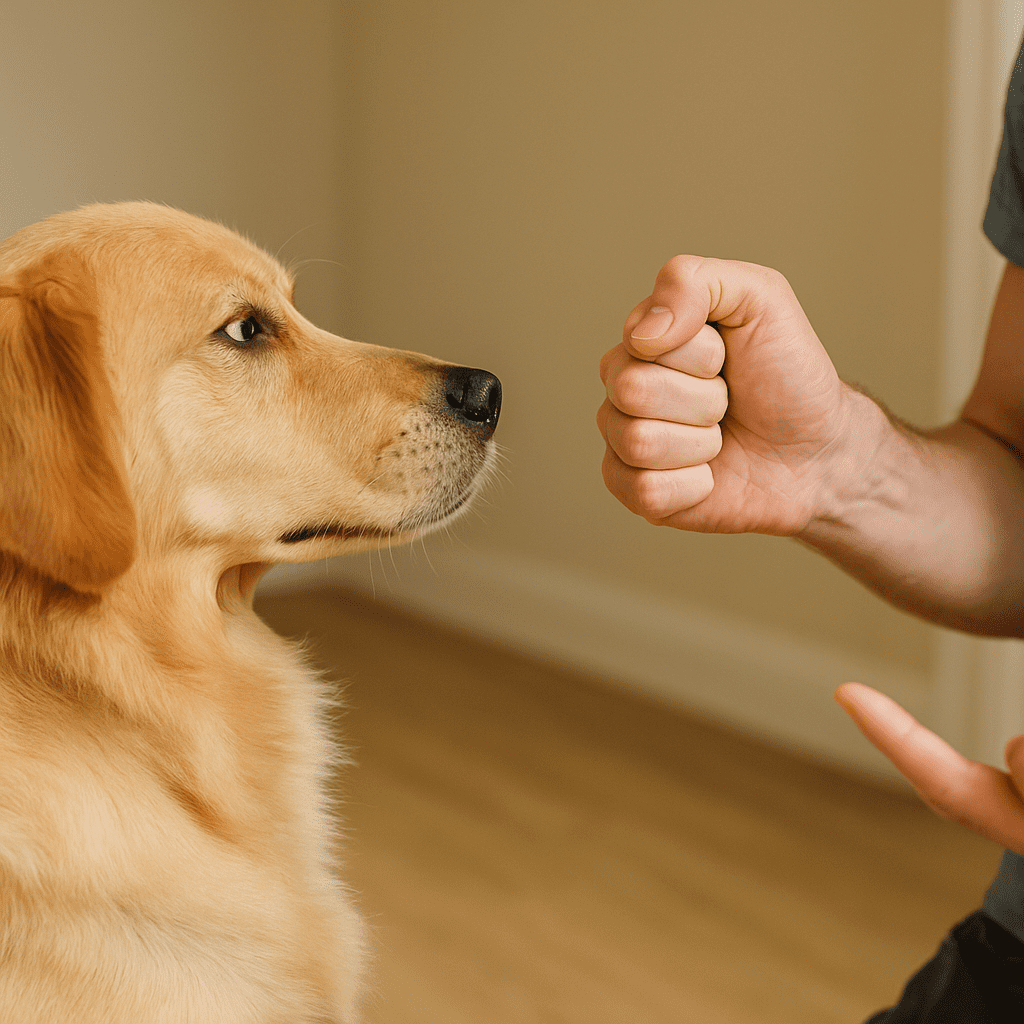
Step 1: Closed-Fist Introduction
- Place a treat in a closed fist. Present your fist at chest height.
- Dog will sniff/lick/paw. Do nothing. The instant your dog backs off or looks away, mark (“Yes!”) and deliver a different treat from your other hand.
- Repeat 8–10 reps until backing off happens quickly.
Goal: Dog disengages from the fist within 1–2 seconds.
Step 2: Add the Cue “Leave It”
- Say “Leave it,” then present the closed fist.
- Mark and reward the first back off or eye contact.
- After 6–8 wins, vary angles and your distance by a step or two.
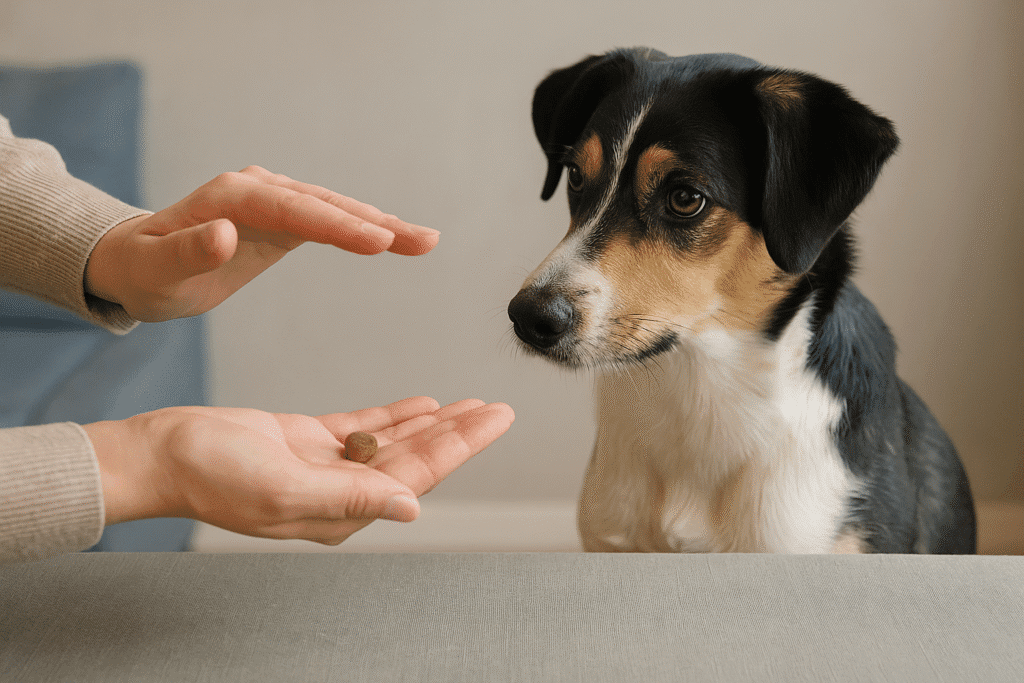
Step 3: Open-Palm Upgrade (Protected)
- Place the treat on your open palm but hover your other hand above it as a “safety lid.”
- Say “Leave it.” If the dog dives, cover the treat; if the dog hesitates/looks to you, mark and pay from your pocket/other hand.
- Build to a 2–3 second pause before marking.
Troubleshooting Day 1
- Dives hard? Return to closed fist for a few reps.
- Stares but won’t look up? Make a soft kiss sound once, then wait. Reward eye contact.
- Frustration whining? Slice the criteria thinner: ask for a one-second pause.
Day 2 — Real Objects, Real Choices (Indoor → Backyard)
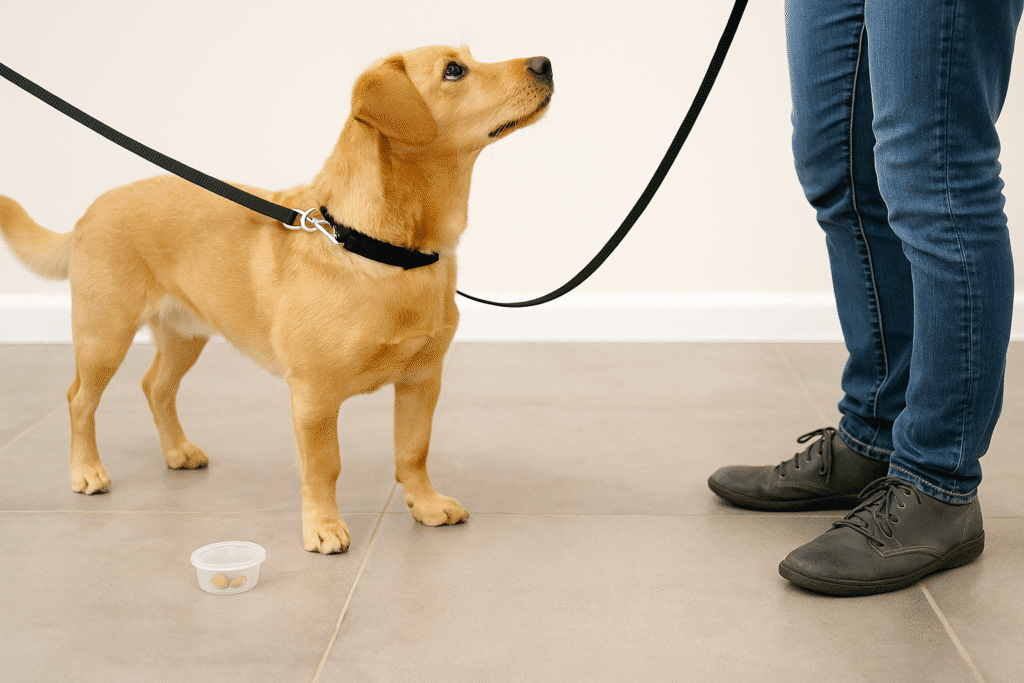
Step 4: Floor Placement with Leash
- On leash, place a low-value item on the floor (kibble in a small container). Say “Leave it.”
- Block access with your foot if needed. When your dog turns away or makes eye contact, mark and pay from you.
- Change angles: pass by the item, circle it, then practice approaching and choosing to leave.
Step 5: Add Motion & Novelty
- Gently roll a treat past the dog. Say “Leave it.” Reward for staying still or looking to you.
- Swap in non-food objects: tissue, sock, toy. Keep rewards generous for good choices.
Step 6: Short Outdoor Reps
Move to a quiet yard or hallway. Use a longer leash if needed. Scatter “decoy” items (empty cup, closed treat jar). Keep sessions 3–4 minutes, lots of wins, then break.
Day 3 — Proofing for Real Life (Street, Lobby, Park)
Today you’ll build reliability with new places, distances, and temptations. Use a harness and high-value rewards. Keep your dog under threshold—if arousal spikes, create distance and lower difficulty.
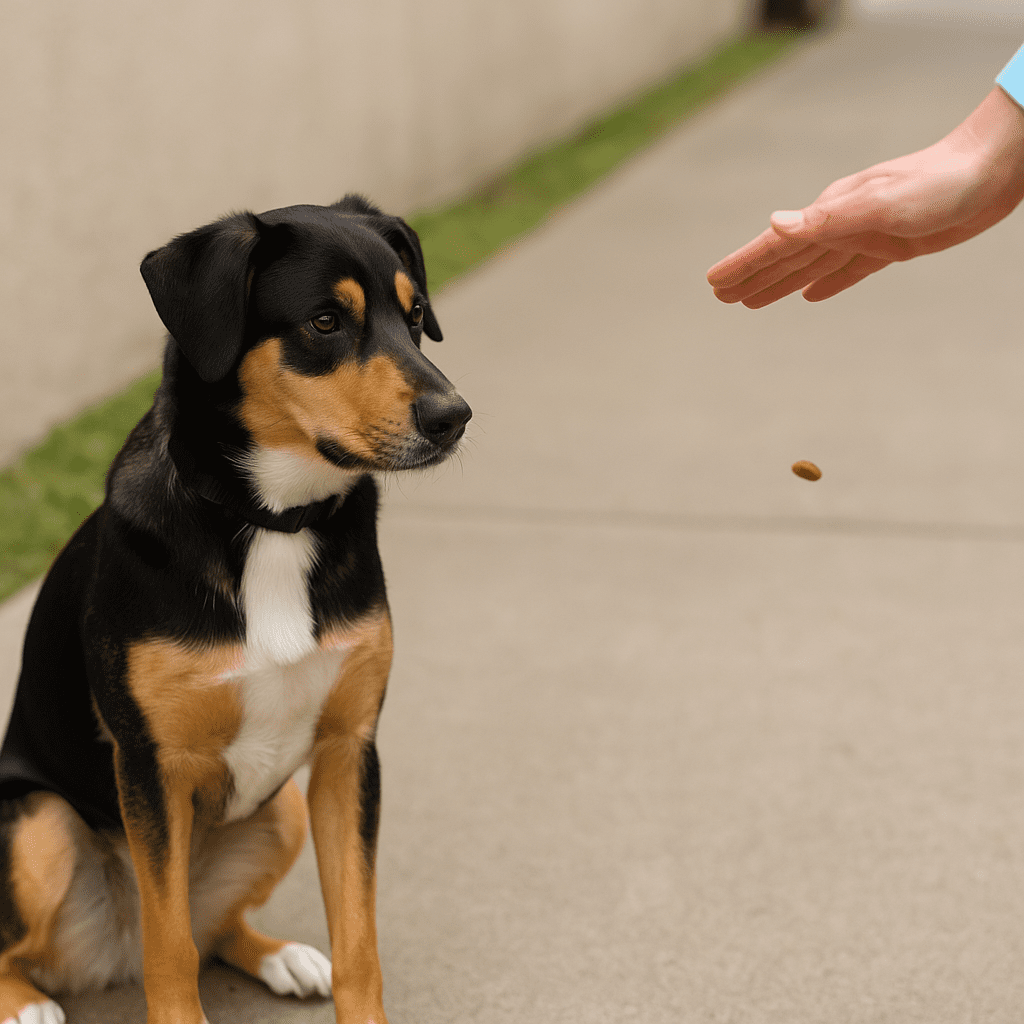
Step 7: The “Surprise Drop” Drill
- On a loose leash, say “Leave it,” then lightly toss a low-value item 2–3 ft away.
- Mark and reward any hesitation, eye contact, or step back. Walk past.
- Increase novelty: different textures (grass, sidewalk), gentle noises (paper rustle).
Step 8: The “Walk-By” & “Return-Past” Patterns
- Approach a planted decoy (sealed snack bag). Say “Leave it,” arc around it, reward for focus.
- Walk 10–15 ft past, turn, calmly pass again. This confirms the cue isn’t one-time—your dog can leave it, and keep leaving it.
Step 9: Temptation Ladder
| Level | Temptation | Environment | Criteria to Advance |
|---|---|---|---|
| 1 | Low-value food in container | Quiet room | 8/10 success |
| 2 | Paper, tissue, sock | Living room | 8/10 success |
| 3 | Rolling kibble | Hallway | 8/10 success |
| 4 | Sealed food bag | Backyard | 8/10 success |
| 5 | Good-smelling scraps (protected) | Sidewalk | 8/10 success |
| 6 | Dropped item from hand | Street/Lobby | 8/10 success |
| 7 | Moving toy/dog in distance | Park edge | 8/10 success |
Tip: “8 out of 10” means it’s time to raise difficulty. If it falls to 5/10, lower it again.
Marker Timing & Payment Strategy
- Mark early wins: The first half-second of hesitation is gold—capture it!
- Pay from you: Reinforcement should never come from the decoy. That keeps “leave it” crystal clear.
- Use jackpots: When your dog resists a huge temptation, give 3–5 tiny treats in a row.
Common Mistakes (and Easy Fixes)
- Asking too much too soon: If your dog fails twice, step down the ladder.
- Talking too much: One cue. Then silence. Let choices happen.
- Paying from the floor: This blurs the rule—always pay from your pocket or pouch.
- Training only indoors: Real life needs real proofing in new places.
When to Use “Leave It” vs “Drop It”
Leave it means “don’t take that thing.” Drop it means “release what’s already in your mouth.” Train both for safety. Start “Drop It” with toy trades in a quiet room, then move outdoors.
Advanced Proofing & Real-World Scenarios
Busy Sidewalks
Plant safe decoys like empty wrappers. Practice walk-bys at 6–8 ft, then 3–4 ft. Reinforce calmly; avoid excitement that spikes arousal.
Kids & Party Food
Use baby gates or tethers as management. Practice “Leave It” with dropped bread crust in a cup for safety. Reward for backing off and checking in with you.
Dog Parks and Wildlife
Distance is your friend. Start at the park perimeter where your dog can think. Mark glances away from squirrels or running dogs, then retreat for a food party.
Emergency “Leave It”
Pair “Leave it!” with a quick back-up step and a bright, high-value reward when your dog follows. Rehearse weekly so it works under stress.
Behavior Science in Plain English
- Counter-conditioning: Temptation becomes a cue to look at you for rewards.
- Differential reinforcement: You pay for alternate behaviors (eye contact, backing up, heel position).
- Desensitization: Gradual increases in difficulty build true self-control.
Sample 3-Day Micro-Schedule
- Morning: 3–4 minutes (foundation or proofing reps)
- Afternoon: 3–4 minutes (new context)
- Evening: 3–4 minutes (easy wins + play)
That’s 9–12 minutes per day—plenty for real progress without burnout.
Safety Notes
- Use a harness and leash anywhere near traffic, trash, or wildlife.
- For dogs with resource guarding or bite history, work with a certified trainer.
- Avoid aversive tools (yanks, prongs, e-collars). We want choice and trust, not fear.
Maintenance: Keep “Leave It” Sharp
- Pay unexpected brilliance forever. Great choices deserve great rewards.
- Run one 60-second refresher daily—two planted items, three passes, celebrate.
- Layer it into life: mailroom, elevator, café patio, parking lot.
Related Guides (Internal Links)
Level up impulse control and safety with these step-by-steps:
- How to Train a Dog to Walk on a Leash Without Pulling
- Separation Anxiety in Dogs: Effective Training & Calming Tips
- Dog Hot Spots Relief Fast: Vet-Approved Treatments & Prevention
Trusted Resources (External)
FAQ: Teaching “Leave It” (Owner Quick Answers)
How long does it really take to teach Leave It?
Most dogs grasp the basics in a day and reach street-ready reliability with this 3-day plan plus 1–2 weeks of light proofing. Keep sessions short and upbeat.
Should I say “No!” instead?
“No” stops behavior but doesn’t teach what to do. “Leave it” tells your dog exactly how to earn rewards—look away, look to you, move on.
What if my dog already grabbed it?
Switch to “Drop it.” Trade for a great treat, then reset the “Leave it” exercise with easier criteria next time.
Will this help with countersurfing?
Yes, but add management (clear counters, closed doors) and reinforce heavy for leaving kitchen surfaces alone.
Is it okay to use punishment?
We recommend reward-based methods. Aversives can suppress behavior short-term but often increase stress and riskier grabs later.
Call to Action
Ready for next-level manners? Explore our step-by-step guides:
Leash Training Without Pulling • Separation Anxiety Calming Plan • Hot Spots: Relief & Prevention
- ALT: Teach Leave It in 3 days—dog backing away from open palm treat
- ALT: Leave It training outdoors—calm leash walk past food wrapper
- ALT: Dog offering eye contact during Leave It proofing on sidewalk
- ALT: Owner rewarding dog for ignoring dropped treat—impulse control